Introduction
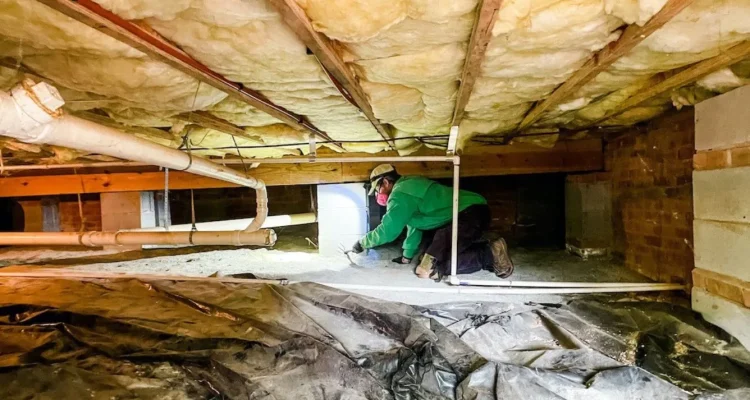
Crawl space encapsulation might not be the most glamorous home improvement task, but it’s one of the most important. Ensuring your crawl space is properly sealed and maintained can protect your home from moisture, pests, and structural damage. In this comprehensive guide, we’ll walk you through everything you need to know about encapsulating your crawl space, from understanding its importance to detailed steps on how to do it yourself or with professional help.
What is Crawl Space Encapsulation?
Crawl space encapsulation involves sealing off the area under your house to control moisture and prevent other issues. It typically includes installing a vapor barrier on the floor and walls, sealing vents, and conditioning the air. This process transforms your crawl space into a dry, clean, and usable part of your home.
Benefits of Encapsulation
- Improved Air Quality: Reduces mold and mildew growth, leading to healthier air inside your home.
- Energy Efficiency: Helps maintain a stable temperature, reducing heating and cooling costs.
- Structural Integrity: Prevents moisture-related damage to your home’s foundation and structure.
- Pest Control: Seals entry points, deterring pests and rodents.
Signs Your Crawl Space Needs Encapsulation
Common Indicators
- Persistent musty odors
- Visible mold or mildew
- Damp or wet insulation
- High humidity levels in your home
- Pest infestations
Ignoring these signs can lead to serious consequences, including compromised air quality and structural damage.
Preparation for Encapsulation
Before starting the encapsulation process, thorough preparation is key.
Inspection and Assessment
- Inspect for mold, pests, and structural damage.
- Measure the crawl space to determine the amount of materials needed.
Necessary Tools and Materials
- Vapor barrier
- Sealant
- Insulation
- Dehumidifier
- Tools: utility knife, tape measure, staple gun, etc.
Step-by-Step Guide to Encapsulation
Cleaning the Crawl Space
- Removing Debris and Mold: Clear out any debris, old insulation, and visible mold. Use a mold-killing solution if necessary.
- Ensuring a Dry Surface: Use a dehumidifier or fans to dry out the crawl space completely.
Sealing Vents and Doors
- Methods and Materials: Use foam board, caulk, and weatherstripping to seal all vents and access doors.
- Importance of Proper Sealing: Proper sealing prevents external moisture and pests from entering the crawl space.
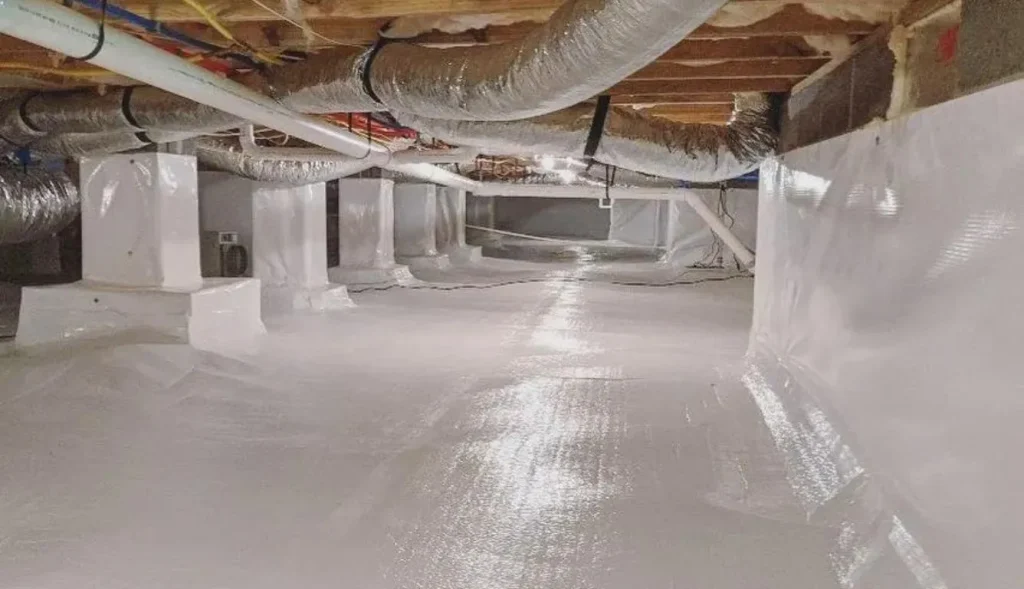
Installing a Vapor Barrier
- Choosing the Right Barrier: Opt for a high-quality, durable vapor barrier, typically 10-20 mil thick.
- Installation Process:
- Cut the barrier to fit the space.
- Secure it to the walls and floor using tape and stakes.
- Ensure all seams are overlapped and sealed.
Insulating the Crawl Space
- Types of Insulation: Use foam board or spray foam insulation for walls and floors.
- Application Techniques: Apply insulation to the walls, ensuring it reaches the floor but not covering it completely.
Conditioning the Air
- Dehumidifiers and Ventilation Systems: Install a dehumidifier to maintain optimal humidity levels. Consider adding a small HVAC unit if necessary.
- Maintaining Air Quality: Regularly check and maintain the dehumidifier and ventilation system to ensure efficient operation.
Cost of Crawl Space Encapsulation
Breakdown of Costs
- Materials: Vapor barrier, sealant, insulation, dehumidifier, etc.
- Labor: Professional installation costs vary depending on the size and condition of the crawl space.
Factors Influencing the Total Cost
- Size of the crawl space
- Condition of the space (e.g., existing mold, pest damage)
- Quality of materials chosen
DIY vs. Professional Encapsulation
Pros and Cons of DIY
- Pros: Cost savings, control over materials and process
- Cons: Time-consuming, requires specialized tools and skills
Benefits of Hiring Professionals
- Expertise: Ensures the job is done correctly and efficiently.
- Warranty: Many professionals offer a warranty on their work, providing peace of mind.
Maintenance After Encapsulation
Regular Inspections
- Check the vapor barrier and insulation periodically for damage or wear.
- Monitor humidity levels to ensure the dehumidifier is working properly.
Maintaining the Vapor Barrier
- Repair any tears or punctures in the vapor barrier immediately.
- Ensure the barrier remains properly sealed at all seams and edges.
Common Mistakes to Avoid
Top Pitfalls in Encapsulation
- Skipping the cleaning step
- Using inadequate materials
- Improper sealing of vents and doors
How to Ensure Effective Encapsulation
- Follow all steps carefully.
- Use high-quality materials.
- Regularly inspect and maintain the encapsulated space.
FAQs
- What is the best vapor barrier for crawl space encapsulation?
- A 10-20 mil thick polyethylene vapor barrier is typically recommended for its durability and effectiveness.
- How often should I check my encapsulated crawl space?
- It’s advisable to inspect your crawl space every six months to ensure everything is in good condition.
- Can I encapsulate my crawl space myself?
- Yes, with the right tools and materials, you can encapsulate your crawl space. However, professional help is recommended for larger or more complex spaces.
- What are the long-term benefits of crawl space encapsulation?
- Long-term benefits include improved air quality, reduced energy costs, enhanced structural integrity, and better pest control.
- How does encapsulation impact my home’s energy efficiency?
- Encapsulation helps maintain a stable temperature in your home, reducing the need for excessive heating or cooling and lowering energy bills.
Conclusion
Crawl space encapsulation is a worthwhile investment that can significantly improve your home’s air quality, energy efficiency, and structural integrity. Whether you choose to tackle the project yourself or hire a professional, following the proper steps and using quality materials will ensure your crawl space remains dry and healthy for years to come.
Congratulation!