Introduction
Grout is an essential component of tiled surfaces, but unsealed grout can quickly become a magnet for dirt, grime, and stains. Cleaning unsealed grout can be a daunting task, but with the right techniques, it’s possible to restore it to its original condition. In this guide, we’ll walk you through everything you need to know about how to clean unsealed grout effectively.
Understanding Unsealed Grout
What is Unsealed Grout?
Unsealed grout is a porous material used to fill the gaps between tiles. Unlike sealed grout, unsealed grout lacks a protective layer, making it more susceptible to absorbing liquids, dirt, and stains. This porosity is both a blessing and a curse—while it allows the grout to bond well with the tiles, it also means that unsealed grout can become dirty and discolored over time.
Importance of Cleaning Unsealed Grout
Regular cleaning of unsealed grout is crucial for maintaining the appearance and hygiene of your tiled surfaces. Dirty grout can harbor bacteria and mold, leading to unpleasant odors and potential health risks. Moreover, clean grout enhances the overall look of your tiles, making your floors, walls, or countertops look fresh and well-maintained.
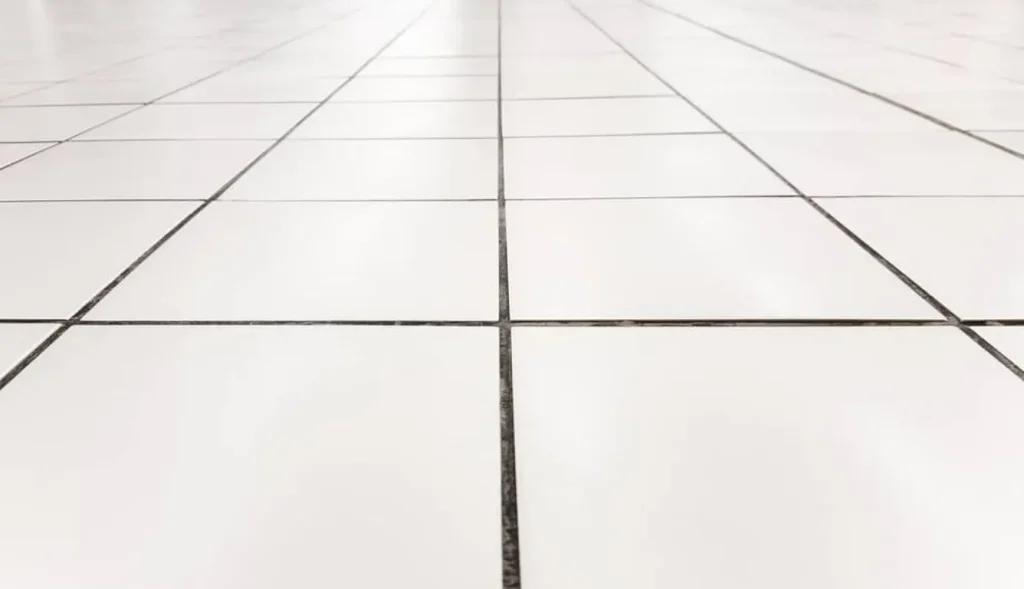
Challenges of Cleaning Unsealed Grout
Cleaning unsealed grout can be challenging due to its porous nature. Dirt and grime can penetrate deep into the grout lines, making it difficult to remove with standard cleaning methods. Additionally, unsealed grout is more prone to staining, especially if spills are not cleaned up promptly. This makes it essential to use the right techniques and products when cleaning unsealed grout.
Tools and Materials Needed
Essential Cleaning Supplies
To effectively clean unsealed grout, you’ll need the following supplies:
- A stiff-bristled brush or grout brush
- Microfiber cloths or sponges
- A bucket of warm water
- Baking soda
- White vinegar
- Hydrogen peroxide
- Lemon juice
- A spray bottle
Optional Tools for Deep Cleaning
For more stubborn stains or heavily soiled grout, you might consider using:
- A steam cleaner
- Commercial grout cleaner
- A toothbrush for detail work
- A small vacuum for dry debris
Preparation Before Cleaning
Assessing the Grout Condition
Before diving into the cleaning process, take a moment to assess the condition of your grout. Look for any signs of damage, such as cracks or crumbling sections, as these areas may require special attention or repair before cleaning.
Pre-Cleaning Tips
Start by sweeping or vacuuming the area to remove loose dirt and debris. This will prevent the dirt from being pushed deeper into the grout lines during cleaning. If you’re dealing with kitchen tiles, consider wiping down the area with a damp cloth to remove surface grease or food residue.
Homemade Cleaning Solutions
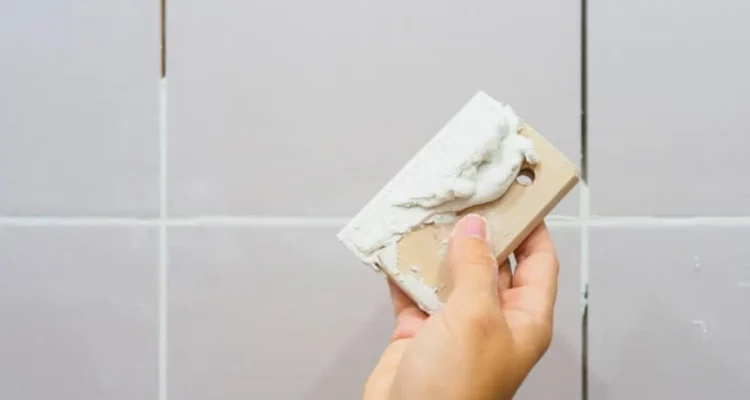
Baking Soda and Vinegar Method
One of the most popular and effective homemade cleaning solutions involves using baking soda and vinegar. Here’s how to do it:
- Mix baking soda with a small amount of water to create a thick paste.
- Apply the paste to the grout lines.
- Spray white vinegar over the baking soda paste. You’ll notice a fizzing reaction, which helps lift dirt from the grout.
- Let the mixture sit for 5-10 minutes.
- Scrub the grout with a stiff-bristled brush, then rinse with warm water.
Hydrogen Peroxide and Baking Soda Paste
For a more powerful cleaning solution, try combining hydrogen peroxide with baking soda:
- Mix equal parts hydrogen peroxide and baking soda to form a paste.
- Apply the paste to the grout lines and let it sit for 10-15 minutes.
- Scrub with a brush, then rinse thoroughly with water.
Lemon Juice and Baking Soda Mixture
Lemon juice is a natural bleaching agent and can help brighten your grout:
- Mix lemon juice with baking soda to create a paste.
- Apply the paste to the grout and let it sit for 5-10 minutes.
- Scrub and rinse with warm water.
Commercial Cleaners for Unsealed Grout
Overview of Popular Products
If homemade solutions don’t do the trick, you might need a commercial grout cleaner. Popular options include brands like Zep, Black Diamond, and Soft Scrub. These products are formulated to penetrate grout lines and lift even the most stubborn stains.
How to Choose the Right Cleaner
When selecting a commercial cleaner, consider the type of tiles you have and the severity of the stains. Some cleaners are harsher than others, so choose one that’s appropriate for your specific needs.
Safety Precautions
Always follow the manufacturer’s instructions when using commercial cleaners. Wear gloves to protect your hands, and ensure the area is well-ventilated. Avoid using bleach-based cleaners on colored grout, as they can cause discoloration.
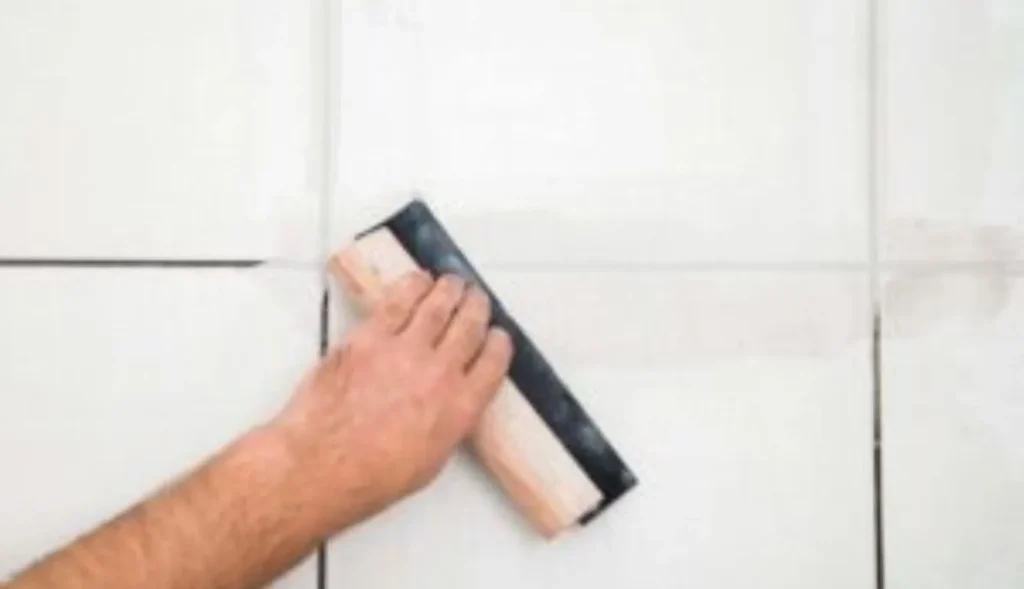
Step-by-Step Cleaning Process
Spot Cleaning Stains
If you notice specific stains on your grout, address them first. Apply your chosen cleaning solution directly to the stain, let it sit for a few minutes, and then scrub with a brush.
Deep Cleaning Techniques
For a thorough cleaning:
- Apply your cleaning solution to the grout lines.
- Let it sit for the recommended time (usually 5-15 minutes).
- Scrub the grout with a stiff brush, using circular motions.
- Rinse the area with warm water, making sure to remove all cleaning residue.
Rinsing and Drying the Grout
After cleaning, it’s essential to rinse the grout with clean water to remove any remaining cleaning solution. Use a microfiber cloth to wipe away excess water and allow the grout to dry completely before using the area again.
Using a Steam Cleaner
Benefits of Steam Cleaning
Steam cleaning is a powerful method that uses high-temperature steam to clean and sanitize grout without the need for harsh chemicals. It’s particularly effective for deep cleaning and can help remove bacteria, mold, and mildew.
How to Steam Clean Grout
- Fill your steam cleaner with water and allow it to heat up.
- Attach the appropriate nozzle for grout cleaning.
- Move the steam cleaner slowly over the grout lines, allowing the steam to penetrate the grout.
- Wipe away any loosened dirt with a microfiber cloth.
Precautions to Take
Ensure you’re using the steam cleaner on a heat-resistant surface. Avoid holding the steam cleaner in one spot for too long, as the high temperature could damage the grout or tiles.
Avoiding Common Mistakes
Using Harsh Chemicals
Avoid using overly harsh chemicals like bleach or ammonia, as they can damage the grout and cause discoloration. Stick to milder cleaning solutions or specialized grout cleaners.
Over-Scrubbing the Grout
While it’s important to scrub the grout, be careful not to overdo it. Excessive scrubbing can wear down the grout, leading to cracks and crumbling.
Ignoring Safety Guidelines
Always wear gloves when handling cleaning solutions, and ensure the area is well-ventilated. Protect your eyes from splashes, especially when working with commercial cleaners.
How to Maintain Unsealed Grout
Regular Cleaning Schedule
To keep your grout looking its best, clean it regularly. Aim for a light cleaning once a week and a deep cleaning every few months, depending on the level of foot traffic and exposure to dirt.
Tips to Prevent Stains
Wipe up spills immediately to prevent stains from setting into the grout. Consider using a grout sealer to protect unsealed grout from future staining.
When to Re-Clean
If you notice that your grout is starting to look dingy or stained again, it’s time to re-clean. Don’t wait until the grout is heavily soiled, as this will make the cleaning process more difficult.
The Importance of Sealing Grout
Benefits of Sealing Grout
Sealing grout adds a protective layer that helps prevent dirt, stains, and moisture from penetrating the grout lines. This can significantly reduce the frequency and difficulty of cleaning.
How to Seal Grout Properly
After cleaning and drying your grout, apply a grout sealer according to the manufacturer’s instructions. Allow the sealer to cure fully before using the area.
Choosing the Right Sealer
There are different types of grout sealers available, including penetrating sealers and membrane-forming sealers. Choose one based on your specific needs and the type of grout you have.
DIY vs. Professional Cleaning
Pros and Cons of DIY Cleaning
DIY cleaning is cost-effective and convenient, but it can be time-consuming and may not always produce professional-level results, especially on heavily stained grout.
When to Call a Professional
If your grout is deeply stained or if you don’t have the time or tools to clean it effectively, consider hiring a professional. They have access to specialized equipment and cleaning solutions that can restore your grout to like-new condition.
Cost Comparison
DIY cleaning is generally cheaper, but it may require more frequent maintenance. Professional cleaning can be more expensive upfront but may provide longer-lasting results.
Environmental Considerations
Eco-Friendly Cleaning Solutions
Consider using environmentally friendly cleaning solutions, such as vinegar, baking soda, and lemon juice. These natural ingredients are effective and less harmful to the environment compared to chemical-based cleaners.
Proper Disposal of Cleaning Products
Dispose of any leftover cleaning solutions according to local regulations. Avoid pouring harsh chemicals down the drain, as they can harm the environment.
Troubleshooting Common Problems
Dealing with Persistent Stains
For stubborn stains that don’t respond to regular cleaning, try a more concentrated cleaning solution or consider using a commercial grout cleaner designed for tough stains.
Handling Mold and Mildew
Mold and mildew can be a problem in damp areas like bathrooms. Use a mold and mildew remover or a mixture of hydrogen peroxide and water to clean affected areas.
What to Do if Grout Starts Crumbling
If you notice that your grout is crumbling, it may be time to replace it. Crumbling grout can’t be effectively cleaned and may require regrouting or professional repair.
FAQs about Cleaning Unsealed Grout
- Can I use bleach to clean unsealed grout?
It’s not recommended to use bleach on unsealed grout, as it can cause discoloration and damage. Stick to milder cleaning solutions or specialized grout cleaners. - How often should I clean unsealed grout?
For best results, clean unsealed grout once a week for light maintenance and perform a deep cleaning every few months. - Is it necessary to seal grout after cleaning?
Sealing grout after cleaning is highly recommended to protect it from future stains and moisture. - Can I use a steam cleaner on colored grout?
Yes, but be cautious and test a small area first to ensure the steam cleaner doesn’t affect the color. - What’s the best way to remove mold from grout?
Use a mixture of hydrogen peroxide and water or a commercial mold and mildew remover to effectively clean mold from grout.
Conclusion
Cleaning unsealed grout doesn’t have to be a nightmare. With the right tools, techniques, and a bit of elbow grease, you can restore your grout to its original glory. Regular maintenance and proper care will keep your grout looking fresh and clean, and sealing the grout will help protect it from future dirt and stains.
Congratulation!