Introduction
Cleaning your oil burner is essential for maintaining your heating system and ensuring it runs efficiently. Regular maintenance can prevent potential hazards like fire risks and carbon monoxide leaks while improving your home’s heating efficiency. In this guide, we’ll walk you through the steps to clean your oil burner safely and effectively, whether you’re doing it yourself or considering professional help.
Understanding How an Oil Burner Works
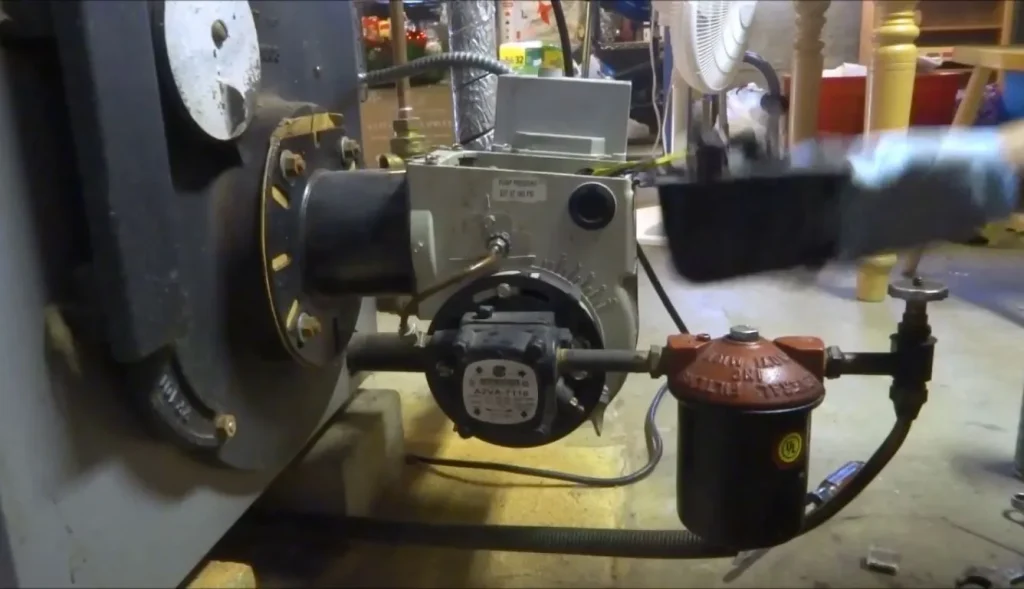
Before diving into the cleaning process, it’s essential to understand how your oil burner works. The oil burner is the central component of your home’s heating system, converting oil into heat energy. Here’s a breakdown of the key parts:
- Combustion Chamber: Where the fuel burns.
- Fuel Nozzle: Sprays oil into the combustion chamber.
- Burner Fan: Delivers air to the combustion process.
- Flame Sensor: Detects the flame to maintain proper burning.
The burner works by heating oil and converting it into a fine mist, which ignites and creates heat. This process leaves behind soot, dust, and other debris that needs regular cleaning.
Signs That Your Oil Burner Needs Cleaning
- Soot and Smoke Emissions: Excessive soot or black smoke is a sign of inefficient combustion, often due to dirt buildup.
- Reduced Heating Efficiency: If your home isn’t heating up as it should, a dirty burner may be the culprit.
- Noisy Operation: Unusual noises could indicate debris accumulation within the burner system.
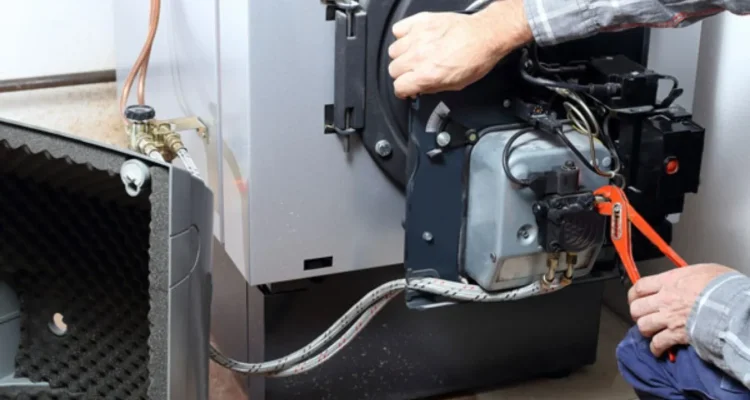
Safety Precautions Before You Start Cleaning
Before you begin, safety should be your top priority.
- Turn Off the Oil Burner: Make sure the system is completely powered down.
- Gather the Right Tools: Ensure you have tools like a vacuum, screwdriver, and cleaning cloths.
- Wear Protective Gear: Gloves and a mask are essential for protection against soot and dust.
Tools You’ll Need to Clean Your Oil Burner
Here’s what you’ll need for a proper cleaning:
- Basic Tools: Screwdriver, adjustable wrench, and vacuum cleaner.
- Specialized Equipment: Combustion analyzer, cleaning brush, and filter wrench.
Step-by-Step Guide to Cleaning an Oil Burner
Step 1: Turn Off and Cool Down the Burner
Always turn off the power to your oil burner and let it cool down before you begin cleaning.
Step 2: Open the Combustion Chamber
Use your screwdriver to remove the access panel to the combustion chamber.
Step 3: Clean the Burner Fan and Blades
Wipe down the fan blades and use a vacuum to remove dust and dirt from the fan area.
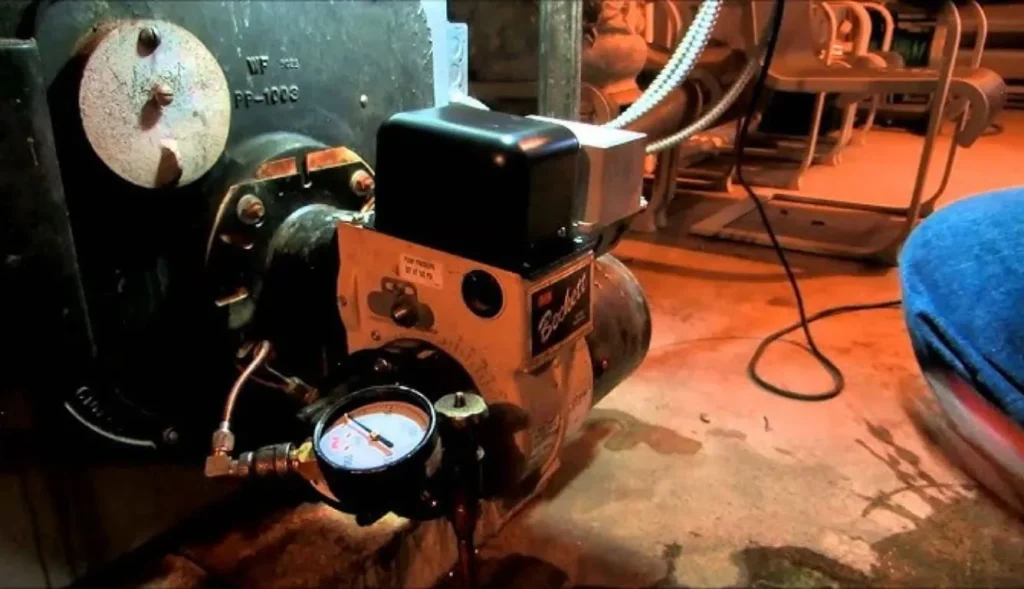
Step 4: Inspect and Clean the Nozzle
The nozzle sprays oil into the combustion chamber. Check for clogs and clean it with a brush if needed.
Step 5: Clean the Flame Sensor
Wipe down the flame sensor to ensure it can accurately detect the flame and keep the system running.
Step 6: Vacuum the Combustion Chamber
Use a vacuum to clear out soot, ash, and dust from the combustion chamber, ensuring nothing obstructs the burner.
Step 7: Reassemble the Oil Burner
Once everything is cleaned and inspected, reassemble the burner components and securely fasten the access panel.
How Often Should You Clean Your Oil Burner?
A typical oil burner should be cleaned at least once a year, ideally before the heating season starts. If you use your burner more frequently, consider biannual cleanings.
Common Mistakes to Avoid When Cleaning an Oil Burner
- Ignoring Small Parts: Don’t overlook cleaning small parts like the nozzle and flame sensor.
- Using Incorrect Cleaning Tools: Make sure you use a vacuum rated for ash and soot to avoid damaging your equipment.
- Not Replacing Worn-Out Parts: If a part is visibly damaged, replace it during cleaning.
The Benefits of a Clean Oil Burner
Regular cleaning ensures your oil burner runs efficiently, extends its lifespan, and reduces energy bills.
When to Call a Professional
If you notice unusual noises, persistent soot buildup, or irregular heating, it might be time to call in a professional. DIY cleaning is effective, but some problems require an expert’s touch.
Troubleshooting After Cleaning
If your burner doesn’t start after cleaning, check if all parts are reassembled correctly and that the burner is securely connected to the power source.
Preventative Maintenance Tips for Oil Burners
Inspect your burner regularly, check for leaks, and replace filters to ensure optimal performance throughout the year.
What Happens If You Don’t Clean Your Oil Burner?
Neglecting your oil burner can lead to carbon buildup, increased fire risk, and costly repairs down the road.
Cost of Professional Oil Burner Cleaning
The average cost for professional oil burner cleaning ranges from $100 to $300, depending on the complexity and location.
FAQs
How Often Should You Clean an Oil Burner?
At least once a year, or more frequently based on usage.
Can You Clean an Oil Burner Yourself?
Yes, but follow safety precautions and use the right tools.
What Happens If You Don’t Clean an Oil Burner?
It can lead to carbon buildup, inefficiency, and increased fire risk.
How Much Does It Cost to Have a Professional Clean an Oil Burner?
The cost typically ranges from $100 to $300.
What Are the Signs That Your Oil Burner Needs Professional Attention?
Unusual noises, excessive soot, and irregular heating are signs to call a professional.
Conclusion
Maintaining your oil burner through regular cleaning is a vital step in ensuring efficient and safe operation. Whether you choose to clean it yourself or hire a professional, making oil burner maintenance a priority will save you money and hassle in the long run.
Congratulation!