Introduction
Hanging pictures in brick walls can seem like a daunting task, especially if you’re used to the simplicity of drywall. Brick walls offer a unique aesthetic appeal but come with their own set of challenges when it comes to mounting artwork. Whether you’re decorating a newly renovated room or trying to enhance your living space, knowing how to properly hang pictures in brick walls is essential to achieving a polished and secure display. In this guide, we’ll walk you through everything you need to know, from selecting the right tools to ensuring your pictures stay securely in place.
Understanding Brick Walls
Before you start drilling, it’s crucial to understand the type of brick wall you’re dealing with. Brick walls vary in construction and composition, which can affect how you approach hanging your pictures.
Characteristics of Brick Walls
Brick walls are typically composed of a series of bricks laid in mortar. They are sturdy and durable, providing a strong support structure. However, this strength also means they can be more challenging to work with compared to drywall.
Different Types of Brick Walls
- Solid Brick Walls: Made entirely of bricks and mortar, these walls offer the most resistance and require specialized tools for drilling.
- Brick Veneer Walls: These walls have a layer of brick on the outside but are supported by another structure, such as wood or metal framing. They are generally easier to drill into.
- Cavity Brick Walls: Featuring an air gap between two layers of brick, these walls can be more complex to work with and might need specific anchoring techniques.
Tools and Materials Needed
To hang pictures on brick walls, you’ll need the right tools and materials. Here’s a comprehensive list:
Essential Tools
- Hammer Drill: Ideal for drilling into hard surfaces like brick.
- Masonry Drill Bits: Designed specifically for brick and mortar.
- Level: Ensures your picture is hung straight.
- Tape Measure: For precise measurements.
- Pencil: For marking placement.
Materials for Hanging Pictures
- Wall Anchors: To support the screws in the brick.
- Screws: Compatible with the anchors.
- Picture Hooks: Designed to hold the weight of your pictures.
- Adhesive Hooks (optional): For less permanent solutions.
Preparation Steps
Proper preparation is key to a successful installation. Follow these steps to ensure accuracy and efficiency.
Assessing the Wall
Examine your brick wall for any imperfections or structural issues. Make sure the surface is clean and dry, as dust or moisture can affect the adhesion of anchors and hooks.
Measuring and Marking
Use a tape measure to determine where you want to hang your picture. Mark the desired spot with a pencil. It’s helpful to use a level to ensure that your marks are even, especially if you’re hanging multiple pictures.
Choosing the Right Hardware
Selecting the appropriate hardware is crucial for a secure installation.
Types of Anchors
- Plastic Anchors: Suitable for lighter pictures.
- Toggle Bolts: Best for heavier items, providing more support.
- Expansion Anchors: Ideal for solid brick walls.
Screws and Hooks
Match screws to the anchors you’ve chosen. Picture hooks should be strong enough to hold the weight of your picture. For larger or heavier frames, consider using multiple hooks or anchors.
Drilling into Brick Walls
Drilling into brick requires a bit more effort than drywall, but with the right technique, it’s manageable.
Selecting the Right Drill Bit
Use masonry drill bits for brick walls. They are designed to penetrate the hard surface without damaging the surrounding material.
Drilling Techniques and Tips
- Mark Your Spot: Ensure accuracy by double-checking your measurements.
- Start Slowly: Begin drilling at a low speed to avoid cracking the brick.
- Keep the Drill Perpendicular: This helps in creating a straight hole.
Installing Anchors and Hooks
Once you’ve drilled the holes, it’s time to insert the anchors and hooks.
How to Insert Anchors
Push the anchor into the drilled hole until it’s flush with the wall. For toggle bolts, insert them through the hole and then tighten them to expand.
Attaching Hooks Securely
Screw the hooks into the anchors. Make sure they are securely fastened and can support the weight of your picture.
Hanging Pictures
Now that your hardware is in place, you can hang your pictures.
Aligning and Leveling
Place your picture on the hooks or nails and use a level to ensure it’s straight. Adjust as needed before finalizing the placement.
Ensuring Stability
Gently tug on the picture to make sure it’s secure. If it wobbles or shifts, adjust the hooks or anchors as necessary.
Alternative Methods for Hanging Pictures
If drilling isn’t an option, there are alternative methods for hanging pictures on brick walls.
Using Adhesive Hooks
Adhesive hooks can be a good temporary solution. They are easy to apply and remove without damaging the wall, but they may not support heavier items.
Picture Hanging Strips
These strips are designed for damage-free hanging and can be a suitable choice for lightweight frames.
Tips for Preventing Damage
To avoid causing damage to your brick wall, follow these tips.
Avoiding Common Mistakes
- Drilling Too Large Holes: This can weaken the wall and make anchors less effective.
- Overloading Hooks: Ensure hooks are rated for the weight of your picture.
- Using Incorrect Anchors: Match anchors to the type of wall and weight of the picture.
Ensuring Longevity of Your Setup
Regularly check the stability of your pictures and make adjustments as needed. This will help maintain the integrity of both your pictures and the wall.
How to Remove Pictures and Fix Holes
When it’s time to change the arrangement or remove pictures, you’ll need to fix any damage.
Removing Hooks and Anchors
Carefully unscrew the hooks and anchors. If necessary, use pliers to remove any stubborn parts.
Repairing Brick Walls
Fill any holes with mortar or spackle designed for brick walls. Smooth out the surface and allow it to dry before repainting if needed.
Safety Considerations
Safety should always be a priority when working with tools and materials.
Safety Gear and Precautions
- Wear Safety Glasses: Protect your eyes from dust and debris.
- Use Ear Protection: If using a hammer drill, it can be loud.
- Handle Tools Properly: Follow the manufacturer’s instructions for use.
Handling Tools Properly
Ensure that tools are in good condition and suitable for the task. Regular maintenance can prevent accidents and ensure effective results.
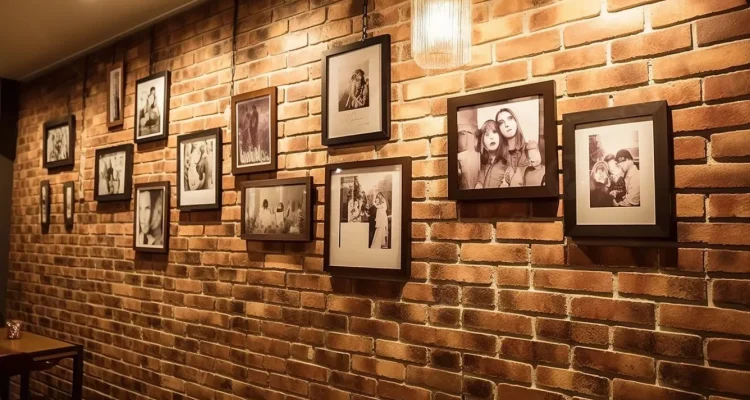
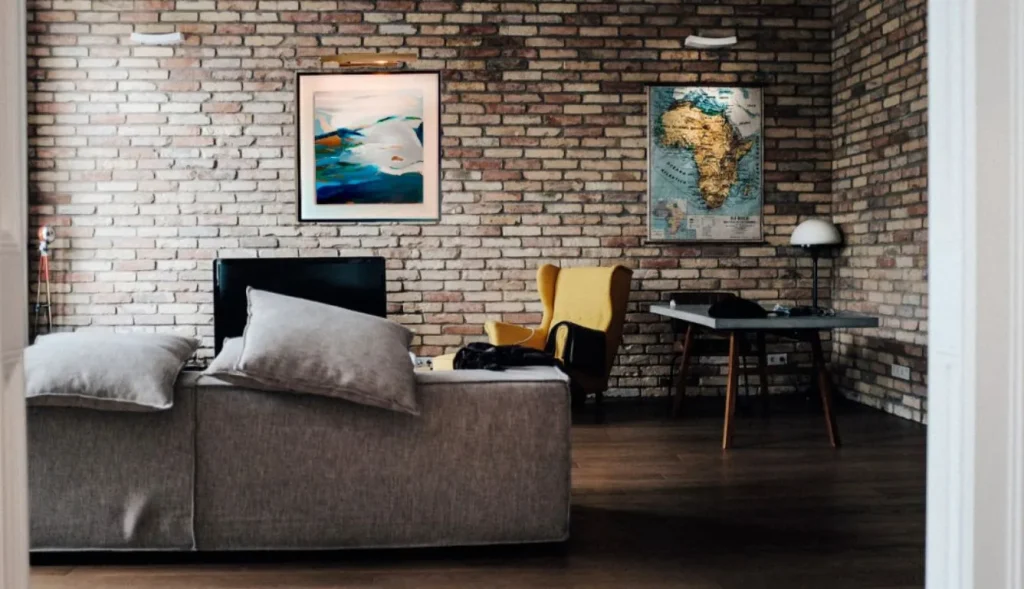
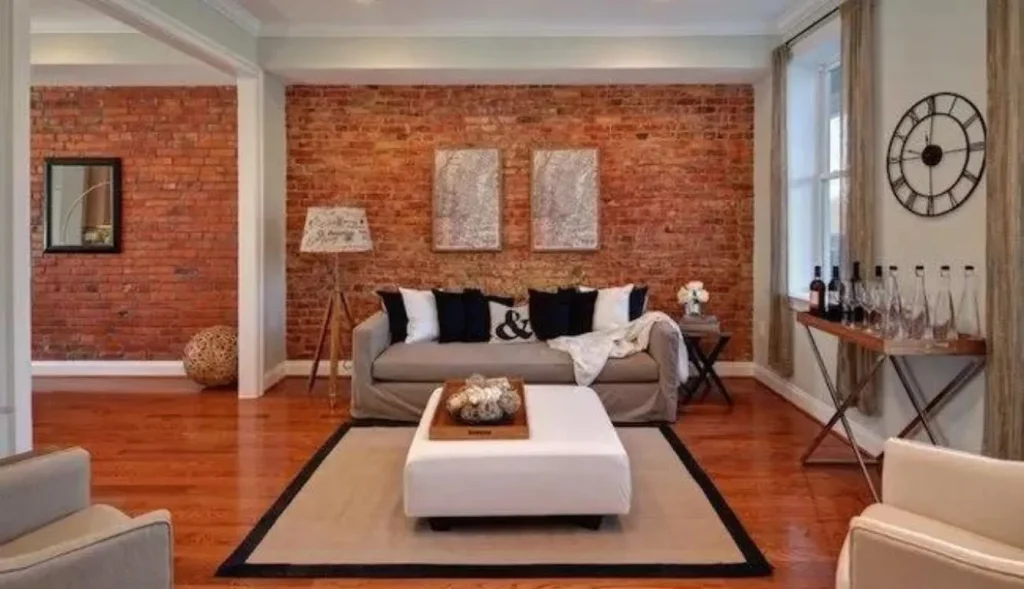
Decorating Tips for Brick Walls
Enhance the look of your brick wall with these decorating tips.
Enhancing Your Display
Consider arranging your pictures in a gallery style for a more dynamic display. Mix and match frames for added visual interest.
Complementing Brick Features
Use the natural texture and color of the brick to complement your decor. Choose frames and artwork that contrast or harmonize with the wall.
Professional Help
Sometimes, a professional touch can make all the difference.
When to Call a Professional
If you’re unsure about drilling or need help with a complex setup, consulting a professional can save time and ensure a flawless result.
What to Expect from a Professional Service
A professional will have the expertise and tools needed to handle tricky installations and provide advice on the best methods for your specific wall type.
FAQs
- How do I know if my wall is suitable for hanging pictures?
- Inspect the wall’s condition and material. Solid brick walls are generally suitable for hanging pictures, but check for any damage or structural issues.
- What kind of anchors are best for heavy pictures?
- Toggle bolts and expansion anchors are best for heavier pictures as they provide greater support and stability.
- Can I use regular nails instead of anchors?
- Regular nails may not be sufficient for brick walls, especially for heavier items. Anchors provide better support and prevent damage.
- How do I fix a hole in a brick wall after removing a picture?
- Fill the hole with mortar or a suitable filler for brick. Smooth it out and allow it to dry before repainting if needed.
- Are there any special considerations for hanging pictures in old brick walls?
- Old brick walls may be more fragile or uneven. Use appropriate anchors and drill carefully to avoid damaging the wall. Consider consulting a professional for complex installations.
Conclusion
Hanging pictures in brick walls doesn’t have to be a stressful task. With the right tools, materials, and techniques, you can securely display your artwork and enhance the beauty of your space. Remember to take your time with measurements, choose appropriate hardware, and follow safety precautions to ensure a successful installation. Whether you’re updating your decor or creating a gallery wall, these tips will help you achieve a polished and professional look.
Congratulation!