Introduction
Peel and stick wallpaper has become a popular choice for home decorators due to its ease of application and variety of designs. However, when it’s time to remove it, many people find themselves at a loss. Proper removal is crucial to avoid damaging your walls and to prepare the surface for a new treatment. In this guide, we will walk you through the step-by-step process of removing peel and stick wallpaper efficiently and safely.
Materials Needed
Before you begin, gather the following tools and materials:
- Plastic scraper or putty knife
- Heat gun or hairdryer
- Soapy water and sponge
- Adhesive remover (optional)
- Cloth or rags
- Drop cloths or plastic sheeting
- Painter’s tape
- Wall patching compound (if needed)
- Sandpaper
- Primer
Preparation
Start by clearing the area around the wall you’ll be working on. Move furniture away from the wall and cover the floor with drop cloths or plastic sheeting to protect it from water and adhesive residue. Use painter’s tape to secure the protective coverings in place.
Testing the Wallpaper
Before diving into the removal process, it’s wise to test a small section of the wallpaper to understand how well it adheres to the wall. Gently peel a corner and see if it comes off easily. This will help you gauge the amount of effort needed and identify any potential issues like wall damage or stubborn adhesive.
Initial Removal Process
Begin at a corner or seam of the wallpaper. Use your fingernail or a plastic scraper to lift the edge. Slowly and gently pull the wallpaper down at a 45-degree angle. Take your time to avoid tearing the wallpaper or damaging the wall beneath it. If the wallpaper comes off easily, continue this method until all the wallpaper is removed.
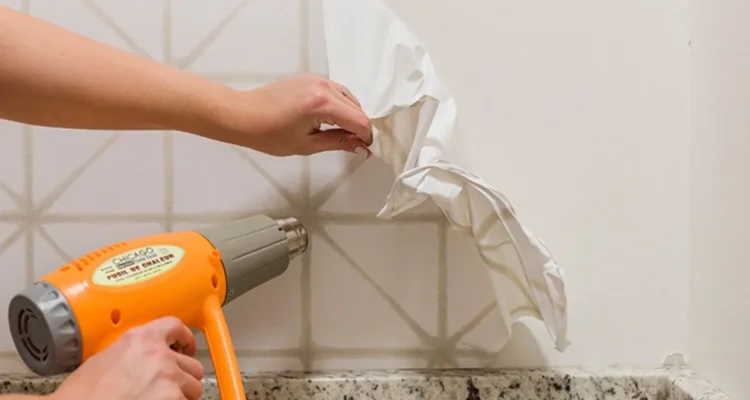
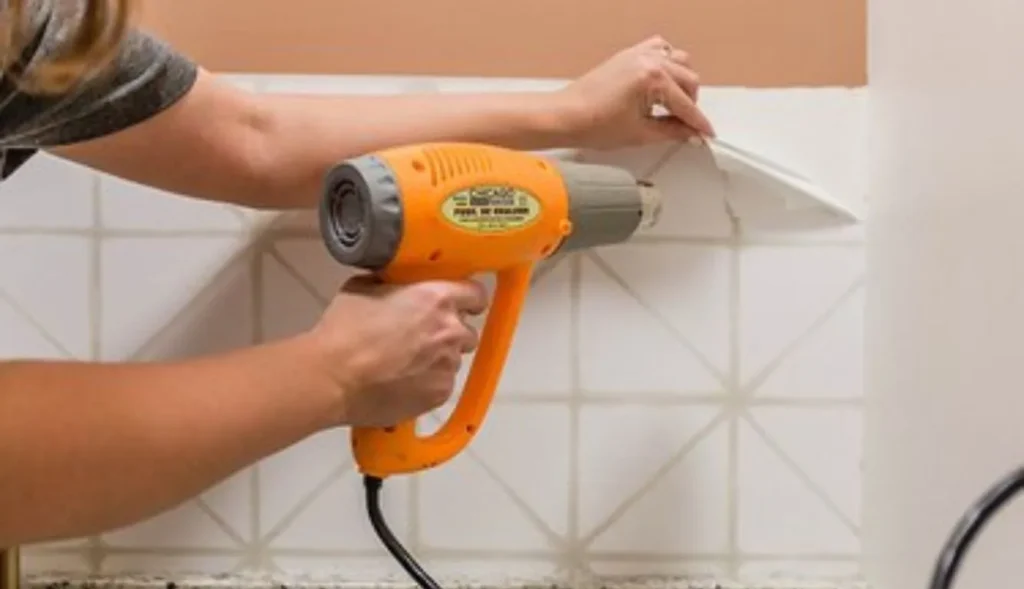
Dealing with Stubborn Sections
If you encounter sections that are difficult to remove, a heat gun or hairdryer can help. Set the heat gun or hairdryer to a medium setting and hold it a few inches from the wallpaper. The heat will soften the adhesive, making it easier to peel off. Alternatively, you can apply an adhesive remover according to the product’s instructions to dissolve the glue.
Removing Residual Adhesive
Once the wallpaper is off, you might notice some adhesive residue left on the wall. Mix a solution of soapy water and use a sponge to scrub the area. For stubborn residue, a commercial adhesive remover can be used. Apply it to the affected area, let it sit for a few minutes, and then wipe it away with a clean cloth.
Cleaning the Wall
After removing the adhesive, wipe down the entire wall with a damp cloth to remove any remaining residue. Ensure the wall is clean and dry before proceeding to the next step. This will help in identifying any damage that needs repair.
Repairing the Wall
Inspect the wall for any damage caused during the removal process. If you find any holes or scratches, use a wall patching compound to fill them in. Once the compound is dry, sand it smooth with fine-grit sandpaper. Finish by applying a coat of primer to prepare the wall for new wallpaper or paint.
Final Inspection
Conduct a final inspection of the wall to ensure it is smooth and free from any adhesive or damage. This step is crucial if you plan to apply new wallpaper or paint, as a clean and smooth surface will ensure better adhesion and a professional finish.
Tips for Different Surfaces
Drywall
Drywall is prone to damage, so be extra cautious when peeling off the wallpaper. Using a heat gun can help minimize the risk of tearing the paper surface of the drywall.
Plaster
Plaster walls are more durable but can still be damaged if the adhesive is strong. Test a small area first and use adhesive remover if necessary.
Textured Walls
Removing wallpaper from textured walls can be more challenging. Heat and adhesive removers are particularly useful in these cases to ensure all adhesive is removed from the crevices.
Common Mistakes to Avoid
Avoid rushing the removal process as this can lead to wall damage. Do not use harsh chemicals that can damage the wall or leave toxic residues. Always follow the instructions for any adhesive removers or tools you use.
Safety Precautions
Ensure proper ventilation by opening windows or using fans, especially when using adhesive removers. Protect your hands with gloves and wear safety goggles to prevent any debris or chemicals from getting into your eyes.
Environmental Considerations
Consider using eco-friendly adhesive removers that are less harmful to the environment. Dispose of old wallpaper and materials responsibly by following your local waste disposal regulations.
FAQs
How long does it take to remove peel and stick wallpaper?
The time it takes depends on the size of the area and the condition of the wallpaper, but generally, it can take a few hours to a day.
Can I reuse peel and stick wallpaper?
Typically, peel and stick wallpaper is not reusable because it loses its adhesive properties once removed.
What if the wallpaper damages my wall?
If the wallpaper damages your wall, repair it using a patching compound and sand it smooth before applying primer and new wallpaper or paint.
How do I remove wallpaper from a textured wall?
Use a heat gun or hairdryer to soften the adhesive and carefully peel the wallpaper off. An adhesive remover may be necessary for stubborn areas.
Are there any eco-friendly ways to remove wallpaper?
Yes, there are eco-friendly adhesive removers available that are less harmful to the environment. Additionally, you can use a mixture of vinegar and water for a natural solution.
Conclusion
Removing peel and stick wallpaper can be a straightforward process if you follow these steps carefully. By taking your time and using the right tools, you can avoid damaging your walls and prepare them perfectly for the next stage of your home improvement project. Happy decorating!
Congratulation!